Draw A Line Segment Of Length 6.3 Cm
News Leon
Mar 17, 2025 · 6 min read
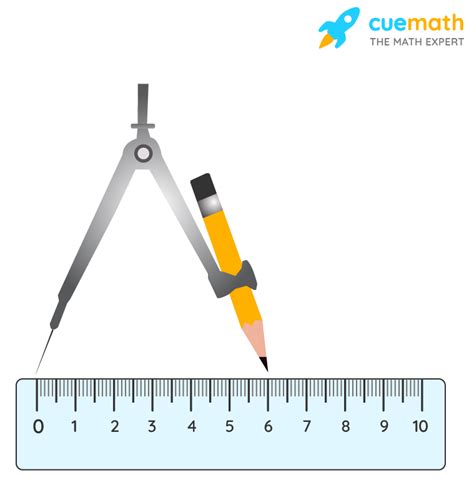
Table of Contents
Drawing a Line Segment of Length 6.3 cm: A Comprehensive Guide
Drawing a seemingly simple line segment of a specific length, like 6.3 cm, might seem trivial. However, achieving accuracy and understanding the underlying principles involved is crucial for various applications, from basic geometry to precise engineering drawings. This comprehensive guide delves into the process, exploring different methods, tools, and considerations for drawing a perfectly accurate 6.3 cm line segment.
Understanding Line Segments and Measurement
Before diving into the drawing process, let's clarify the terminology. A line segment is a part of a line that has two endpoints. Unlike a line, which extends infinitely in both directions, a line segment has a defined beginning and end. The length of a line segment is the distance between these two endpoints. In our case, we aim to create a line segment precisely 6.3 cm long.
Accuracy in measurement is paramount. While seemingly minor, an error of even a millimeter can significantly impact results in fields like engineering, architecture, and design. Understanding the limitations of your tools and employing appropriate techniques is vital for minimizing error.
Tools and Materials Required
The tools and materials you'll need for this task are readily available and relatively inexpensive. The choice of tools influences the precision you can achieve.
1. Ruler or Straight Edge:
A ruler is the most fundamental tool for drawing a line segment. Look for a ruler with clear, precise markings in centimeters and millimeters. A metal ruler is generally preferred over plastic for its sturdiness and resistance to warping, ensuring more accurate measurements. Alternatively, a set square, a triangular-shaped ruler, provides a robust straight edge and is particularly useful for drawing perpendicular lines.
2. Pencil:
Choose a sharp pencil with a fine lead (like a 2H or HB). A blunt pencil leads to imprecise lines and makes it harder to achieve the desired accuracy. The sharpness of your pencil directly influences the precision of your drawing. Regularly sharpening your pencil throughout the process ensures consistent line quality.
3. Erasers:
Having an eraser readily available is essential. Errors are inevitable, especially when working with precise measurements. A quality eraser, capable of removing pencil marks cleanly without smudging or damaging the paper, will aid in corrections. Consider using a kneaded eraser for fine detail work and removal of small errors.
4. Paper:
Use smooth, flat paper. A textured paper surface can make accurate line measurements challenging. A sturdy drawing paper is optimal but standard printer paper will suffice for practice.
Methods for Drawing a 6.3 cm Line Segment
Several methods can be used to draw a 6.3 cm line segment, each with varying degrees of accuracy and complexity.
Method 1: Direct Measurement with a Ruler
This is the most straightforward approach.
-
Place the ruler: Position your ruler on the paper, ensuring it lies flat and its zero mark is aligned with the point where you want the line segment to begin.
-
Mark the endpoint: Carefully mark the paper with your pencil at the 6.3 cm point on the ruler.
-
Draw the line segment: Gently draw a straight line connecting the zero mark and the 6.3 cm mark using your sharp pencil. Avoid pressing too hard to prevent indenting the paper and obscuring the line.
Accuracy Considerations:
- Ensure the ruler is correctly positioned and remains still during the marking and drawing process. Any slight movement will lead to inaccuracies.
- Use a sharp pencil to make precise marks.
- Double-check your measurement before drawing the line.
Method 2: Using a Compass and Ruler (For Advanced Precision)
This method leverages the properties of circles to achieve higher precision.
-
Draw a baseline: Draw a light straight line on your paper.
-
Mark a starting point: Select a point on this baseline to be the start of your line segment.
-
Set compass radius: Set the compass to 6.3 cm. Ensure the compass is tightly secured to prevent accidental changes in its radius.
-
Draw an arc: Place the compass point at the starting point and draw a small arc that intersects the baseline. The intersection point will represent the endpoint of your 6.3 cm line segment.
-
Draw the line segment: Draw a straight line connecting the starting point and the intersection point created by the arc.
Accuracy Considerations:
- Using a compass requires practice for consistent accuracy. Ensure the compass radius is accurately set.
- Lightly draw the arc to avoid obscuring the final line segment.
Method 3: Utilizing Gridded Paper or Software
For less demanding applications, gridded paper or digital drawing software offers an alternative approach.
-
Gridded Paper: If using gridded paper with, for example, 1 mm or 0.5 mm grid spacing, you can carefully count the squares to create the 63 mm (6.3 cm) line segment.
-
Digital Drawing Software: Programs like Adobe Illustrator, AutoCAD, or even simple drawing apps provide tools for precisely defining the length of line segments, reducing the risk of manual errors significantly. These tools offer pixel-perfect accuracy.
Error Analysis and Mitigation
Even with careful techniques, minor errors can creep in.
-
Parallax Error: This occurs when you view the measurement from an angle, rather than directly above. Always look directly down at the ruler to minimize parallax.
-
Ruler Imperfection: Over time, rulers can become warped or their markings might fade. Using a high-quality, well-maintained ruler is essential.
-
Pencil Slippage: A slight slip of the pencil during drawing can deviate from the desired length. A light touch and steady hand are crucial.
To mitigate these errors, repeated measurements and careful attention to technique are crucial. It's always beneficial to double-check your work and make multiple attempts to ensure consistency.
Applications of Accurate Line Segment Drawing
The ability to accurately draw line segments of specific lengths is fundamental to numerous applications:
- Geometry: Constructing geometric shapes, solving geometric problems.
- Engineering Drawing: Creating technical drawings, blueprints, and schematics.
- Architecture: Designing buildings, structures, and landscapes.
- Art and Design: Creating precise illustrations, designs, and artwork.
- Mapping and Surveying: Precise measurements are essential for accurate representation.
- Computer-Aided Design (CAD): Many CAD programs rely on accurate line segments as the building blocks of more complex designs.
Mastering this seemingly basic skill is a cornerstone of precision and accuracy in a variety of fields.
Conclusion: Practice Makes Perfect
Drawing a 6.3 cm line segment might seem simple, but the pursuit of accuracy reveals the importance of precision and attention to detail. By understanding the tools, methods, and potential sources of error, you can significantly improve your ability to create accurate line segments. Consistent practice with the techniques described above will enhance your skill and allow you to confidently tackle more complex drawing tasks in various contexts. Remember, accuracy is not just about the final result; it's about the careful process employed to achieve it.
Latest Posts
Latest Posts
-
Explain Why Plants Are Called Producers
Mar 17, 2025
-
What Is The Systematic Name Of Mg No3 2
Mar 17, 2025
-
What Kind Of Acid Is In A Car Battery
Mar 17, 2025
-
What Is The Molar Mass Of Ca Oh 2
Mar 17, 2025
-
Which Of These Structures Is Diploid
Mar 17, 2025
Related Post
Thank you for visiting our website which covers about Draw A Line Segment Of Length 6.3 Cm . We hope the information provided has been useful to you. Feel free to contact us if you have any questions or need further assistance. See you next time and don't miss to bookmark.
